Cloud computing has become the backbone of modern businesses. From startups to multinational enterprises, organizations rely on cloud platforms to store data, run applications, collaborate remotely, and scale operations efficiently. However, as cloud adoption continues to grow, cyber threats targeting cloud environments have become more sophisticated.
A single cloud misconfiguration, weak password, or compromised account can expose sensitive customer information, financial records, and business-critical applications. According to industry reports, cloud security incidents are increasing every year due to human errors, ransomware attacks, insider threats, and poor security practices.
This guide explores the most effective cloud security best practices for businesses in 2026. Whether your organization uses Amazon Web Services (AWS), Microsoft Azure, Google Cloud Platform (GCP), or a hybrid cloud environment, these recommendations will help strengthen your security posture.
What Is Cloud Security?
Cloud security is the collection of technologies, policies, controls, and best practices used to protect cloud-based infrastructure, applications, workloads, and data from cyber threats.
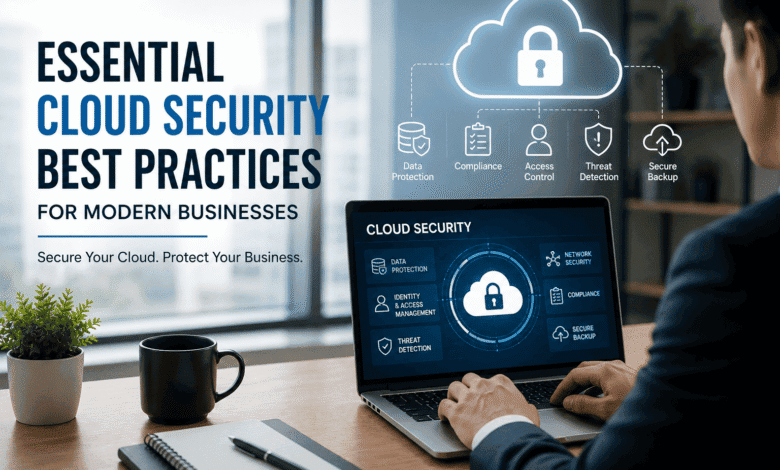
Cloud security includes:
- Identity and access management
- Data encryption
- Network protection
- Compliance management
- Threat detection
- Backup and disaster recovery
- Continuous monitoring
Its primary objective is to ensure the confidentiality, integrity, and availability of cloud resources.
Why Cloud Security Matters
Businesses store valuable information in the cloud, including:
- Customer databases
- Financial transactions
- Intellectual property
- Employee information
- Marketing data
- Business applications
Without proper protection, attackers may exploit vulnerabilities to steal sensitive data or disrupt business operations.
Strong cloud security helps organizations:
- Prevent data breaches
- Reduce cyberattack risks
- Meet compliance requirements
- Build customer trust
- Minimize downtime
- Improve operational resilience
Common Cloud Security Threats
Understanding potential threats is the first step toward effective cloud protection.
Data Breaches
Unauthorized users gain access to confidential information due to poor security configurations or compromised credentials.
Misconfigured Cloud Storage
Improperly configured storage buckets or databases often expose sensitive data publicly.
Weak Passwords
Simple passwords and password reuse make cloud accounts vulnerable to brute-force attacks.
Insider Threats
Employees or contractors with excessive privileges may intentionally or accidentally expose critical data.
Ransomware
Attackers encrypt cloud-hosted data and demand payment for recovery.
Malware
Malicious software can spread through cloud-hosted applications and compromise sensitive information.
API Vulnerabilities
Insecure APIs may allow attackers to access cloud resources.
Cloud Security Best Practices for Businesses
1. Enable Multi-Factor Authentication (MFA)
Passwords alone are no longer sufficient.
Multi-factor authentication requires users to verify their identity using additional methods such as:
- Authentication apps
- Security keys
- Biometrics
- One-time verification codes
MFA significantly reduces unauthorized access.
2. Follow the Principle of Least Privilege
Employees should only receive access required for their specific responsibilities.
Avoid giving administrator privileges unless absolutely necessary.
Regularly review:
- User permissions
- Administrator accounts
- Service accounts
- Temporary access
3. Encrypt Sensitive Data
Encryption protects information both:
At Rest
Stored files remain encrypted inside cloud storage.
In Transit
Data transferred between systems is protected using secure encryption protocols such as TLS.
Encryption ensures stolen data remains unreadable.
4. Use Strong Identity and Access Management (IAM)
Implement centralized identity management by:
- Creating user groups
- Assigning role-based permissions
- Removing inactive accounts
- Monitoring login activity
- Enforcing password policies
IAM minimizes unauthorized access across cloud environments.
5. Keep Software Updated
Outdated operating systems, applications, and cloud services may contain known vulnerabilities.
Maintain:
- Security patches
- Operating system updates
- Application updates
- Database upgrades
Enable automatic updates whenever possible.
6. Regularly Backup Business Data
Reliable backups are essential for business continuity.
Follow the 3-2-1 backup strategy:
- Three copies of data
- Two different storage media
- One off-site or cloud backup
Regularly test backup restoration procedures.
7. Continuously Monitor Cloud Activity
Real-time monitoring helps identify suspicious behavior before major damage occurs.
Monitor:
- Login attempts
- API requests
- Network traffic
- Configuration changes
- Privileged account activity
Use automated alerting systems for faster incident response.
8. Secure Cloud APIs
Many business applications rely on APIs.
Protect APIs by:
- Using authentication tokens
- Limiting API permissions
- Implementing rate limiting
- Encrypting API traffic
- Monitoring API usage
9. Conduct Regular Security Audits
Routine security assessments identify hidden weaknesses.
Review:
- User permissions
- Firewall rules
- Cloud configurations
- Security policies
- Compliance status
Automated cloud security assessments help detect risks early.
10. Educate Employees About Cybersecurity
Human error remains one of the leading causes of security incidents.
Provide regular training on:
- Phishing attacks
- Password security
- Social engineering
- Safe file sharing
- Device security
Security awareness creates the first line of defense.
11. Implement Zero Trust Security
Zero Trust assumes that no user or device should be trusted automatically.
Verify every request by evaluating:
- User identity
- Device health
- Location
- Risk level
- Authentication status
This approach greatly improves cloud security.
12. Enable Security Logging
Detailed logs simplify investigations after security incidents.
Track:
- User logins
- File downloads
- Configuration changes
- Failed authentication attempts
- Administrative activities
Store logs securely for future analysis.
13. Protect Endpoints
Cloud security extends beyond the cloud itself.
Secure all connected devices using:
- Endpoint protection software
- Device encryption
- Antivirus
- Automatic updates
- Mobile device management
14. Implement Disaster Recovery Planning
Every business should prepare for unexpected incidents.
A disaster recovery plan should include:
- Recovery procedures
- Backup locations
- Recovery objectives
- Communication plans
- Testing schedules
Preparation minimizes downtime.
15. Stay Compliant with Industry Regulations
Businesses should understand applicable compliance requirements such as:
- GDPR
- HIPAA
- ISO 27001
- SOC 2
- PCI DSS
Compliance improves security while avoiding legal penalties.
Cloud Security Checklist
Before deploying business workloads, verify the following:
- MFA enabled
- Strong IAM policies
- Data encrypted
- Regular backups configured
- Logging enabled
- Continuous monitoring active
- Employee training completed
- APIs secured
- Security patches installed
- Disaster recovery tested
- Compliance verified
Emerging Cloud Security Trends in 2026
Cloud security continues to evolve with new technologies.
Key trends include:
- AI-powered threat detection
- Extended Detection and Response (XDR)
- Cloud Security Posture Management (CSPM)
- Identity-first security
- Confidential computing
- Secure Access Service Edge (SASE)
- Passwordless authentication
- Automated compliance monitoring
Organizations adopting these technologies can better defend against evolving cyber threats.
Benefits of Strong Cloud Security
Implementing cloud security best practices provides several advantages:
- Reduced cyberattack risk
- Better regulatory compliance
- Increased customer trust
- Improved business continuity
- Lower recovery costs
- Stronger data protection
- Enhanced operational efficiency
- Greater visibility into cloud environments
Conclusion
Cloud computing offers tremendous flexibility, scalability, and cost savings, but it also introduces new security challenges. Businesses must adopt a proactive security strategy that combines strong identity management, encryption, continuous monitoring, employee awareness, secure backups, and regular security assessments.
Cloud security is not a one-time project—it is an ongoing process. By implementing the best practices outlined in this guide, businesses can significantly reduce cyber risks, protect valuable data, maintain compliance, and confidently embrace cloud technologies in 2026 and beyond.
Frequently Asked Questions (FAQs)
1. What is cloud security?
Cloud security is the set of technologies, policies, and practices used to protect cloud infrastructure, applications, and data from cyber threats.
2. Why is cloud security important for businesses?
It helps prevent data breaches, ransomware attacks, unauthorized access, financial losses, and regulatory violations while ensuring business continuity.
3. What are the biggest cloud security risks?
Common risks include misconfigured cloud storage, weak passwords, phishing attacks, insider threats, insecure APIs, and ransomware.
4. What is the best way to secure cloud accounts?
Enable multi-factor authentication (MFA), use strong passwords, implement role-based access control (RBAC), encrypt sensitive data, and continuously monitor user activity.